
 Shutterstock Royalty-free stock photo ID: 445094317
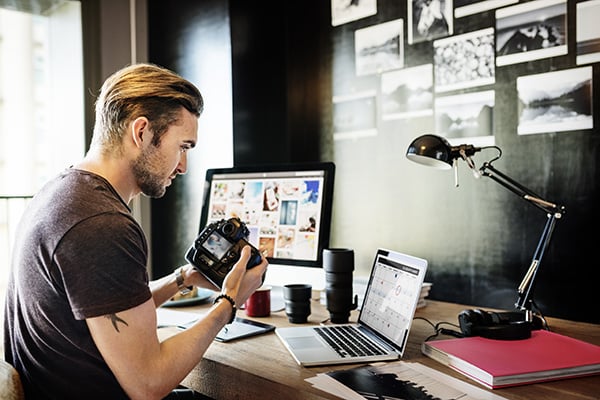
You might not expect to hear this from an insurance broker, but if you’re wondering whether you need insurance – maybe you don’t!
Many photographers, and most professional photographers, don’t need to wonder: they know, because they are told they must carry insurance. If you apply for a permit to shoot at a Provincial Park or rent gear from a rental house, they won’t issue your permit or release the gear until you provide proof of insurance. In these instances, insurance is a necessity.
If no one is requiring you to carry insurance, but you still think it would be prudent to have, below are some things to consider when deciding whether you need insurance.
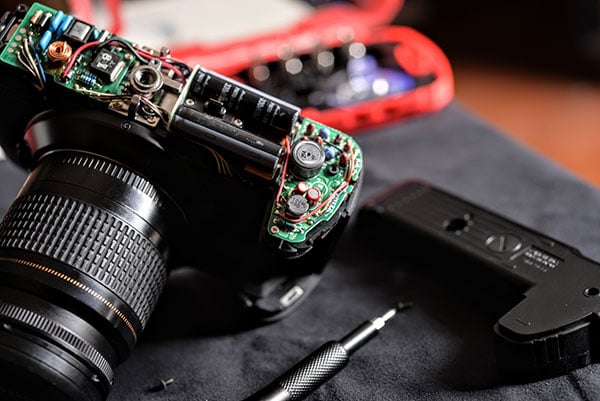
Insurance is intended to protect you from catastrophic losses. A catastrophic loss is one that you couldn’t possibly recover from without insurance. If your total assets are a camera body and two lenses that altogether cost about $3,000 CAD, replacing them after a theft might be difficult, even painful, but not impossible—not catastrophic. You wouldn’t have to declare bankruptcy, for instance. If you can’t pay for their replacement out of pocket, maybe you put the purchase on a credit card and pay it off over the course of a few months. The interest payments would likely still be less than what you would pay in insurance premiums.
Once you start amassing some serious gear, however, you’ll need to start thinking about insurance. You probably don’t want to carry a $10K balance on a credit card. Perhaps you don’t have a credit card with a $10K limit. At a certain point, the cost of replacing all your assets becomes “catastrophic”. Knowing the replacement cost value of your total assets – and the impact that a worst-case-scenario would have on you or your business – will help you decide when (or at what point) you need insurance.
The idea of a “catastrophic loss” comes into sharper focus when talking about liability. Here, the values are not in the thousands but in the hundreds of thousands or even millions. Very few people can put a million dollars on a credit card.
If you injure someone with your car, your car insurance pays the damages. If you injure someone as a private citizen and they sue you for negligence, your home insurance may cover damages the courts award against you. But, what if you injure someone while you’re working? You’re not in a car, and your home insurance likely excludes claims arising from “business activities” (note: home insurance policies don’t distinguish between fledgling businesses vs. established businesses—if you’re getting paid to be there, you’re a business).
Liability coverage for your business activities may be obtained through Commercial General Liability (CGL). If you work in or with the public, or in places where you could conceivably cause bodily injury or property damage to third parties, you have a liability exposure and should consider getting CGL.
Almost every insurance policy has a deductible. A typical commercial property deductible is around $500 to $1,000. A deductible is an amount you’re responsible for paying (for repairs or replacements) before the insurance policy will respond.
Maybe your worst-case-scenario is having your gear stolen while you’re backpacking in Thailand, and you’d be out $5,000. The insurance policy initially costs $500, and the deductible is $1,000. In the event of a total loss, the insurance policy would only save you out-of-pocket costs of $3,500 ($5,000 less the $1,000 deductible, less the $500 premium). Maybe you’d still consider that “catastrophic” and worthwhile insuring. At least: if you know going in what the deductibles are, you won’t be surprised by the actual expense of replacing your gear.
Remember that insurance is intended to cover catastrophic losses. Deductibles are related to this original intent. An insurance company is not a maintenance service you hire to fix every little dent and scratch. Insurance companies do not want to be involved in thousands of small claims, so they impose deductibles to limit the number of claims they have to handle. Check the deductibles before you buy a policy, and think about the deductibles when you are deciding whether or not you need insurance.
Regardless of whether you are renewing or purchasing photography business insurance for the first time, you should consider the following to ensure the best price and protection:
Limits that are too high cost you unnecessary premium dollars. Have you updated your inventory of gear and determined a current replacement cost value? If your replacement cost value is higher than the limit on your policy, you are under-insured and should purchase a higher limit of coverage.
The minimum general liability coverage you should purchase is $1,000,000. The general liability will protect you from lawsuits that result from property damage or bodily injury that you, or your employees cause while shooting. The liability policy will pay the legal costs for your lawyer and the judgement costs up to the liability limit that you purchased.
Will your current liability policy provide enough protection if you end up in court defending a lawsuit from a well-paid programmer’s husband after you permanently disabled her when your Pelican lens case was knocked off your rooftop shooting location onto the sidewalk below? A programmer who is 40 years old making $200,000 a year could sue for 20 lost years of future earnings – or $4,000,000. Additional limits of liability coverage typically go down in cost for each million over 1mil that you purchase.
Is there an online option that asks for only necessary information in a clickable format? Are the drop down boxes that explain the coverage clear and comprehensive? There should be no need to scan paper applications back and forth.
At Front Row, we've created a 5-minute online photography insurance solution.
Available to Canadian photographers: 
The policy term is for 12 months and coverage is available in most countries worldwide except those subject to trade restrictions. Or, for a lower premium, you can choose Canada/USA only coverage.
Rental equipment coverage is also available. All equipment is covered for replacement cost for: theft, damage, fire and loss of use.
For professional photographers, the world is their workplace. They need to be able to pick up and go wherever—and whenever—the light is magic. That means they’re travelling with valuable equipment, and that means, theft from a vehicle is a serious concern. Did you know some insurance policies don’t cover theft from a vehicle? Crazy, right? At Front Row Insurance, our Photographers insurance program WILL cover your equipment if it is stolen from an unattended vehicle, but with some important conditions.
“Hold-up” (as in, “stick-‘em-up!”) is also covered under our policies, so if someone forces you to unlock your vehicle using threat of violence, you will still be covered. But again, you need to file a police report. Understanding these conditions prepares you to understand how your Photographer’s insurance policy will (or won’t) respond in the event of a theft from a vehicle.
Remember, even with camera gear insurance, it’s better if your gear never gets stolen in the first place! Insurance is just one tool you have to protect your business from losses, but you should also be practicing good risk management.
At Front Row Insurance, we offer 12 month prior policies that cover you worldwide, except in countries subject to trade restrictions. All your equipment is covered for replacement cost, and coverage for rented equipment is also available. Plus, as part of your policy you automatically get:

Even if you’re not using a filter to obtain any particular photographic effect, it’s still wise to keep a filter on your camera lens in order to add a layer of protection. A UV or ND filter could be used; either filter will help prevent scratches from getting on the lens.
The AmazonBasics UV Protection Camera Lens Filter would likely do the job, but you could also go with something fancier such as the K&F Concept 82MM Ultra Slim ND Filter Adjustable Neutral Density Filter if you’re willing to spend a bit more. [Amazon Affiliate Links]
The lens cap is under-appreciated and best practices around using lens caps are often not followed, so it’s worth reminding: you should keep lens caps (both front and rear) on your lenses at all times when you’re not using them, such as when they’re in a camera bag.
The lens cap that came with your camera might be perfectly adequate, but do you have a backup? There might also be some better, sturdier lens caps out there that would be a good fit for your camera. It’s worth doing some research.
The Lens Cap Bundle - 4 Snap-on Lens Caps for DSLR Cameras from CAMKIX is worth a look. The Nikon LF-4 Rear Lens Cap is also well reviewed. [Amazon Affiliate Links]
Along with helping prevent ugly flares in your pictures, lens hoods also serve the purpose of physically protecting your lens AND filter. If you hit an object with your lens, chances are the hood will hit it first and keep your lens and filter undamaged.
The Kiwifotos 50mm Reversible Lens Hood seems to have mostly positive reviews on Amazon. The FOTGA Bayonet Mount Lens Hood is also well reviewed. [Amazon Affiliate Links]
If you’re actually using your camera gear, then inevitably some dust and/or “gunk” will get on the surface of the lens and a proper camera cleaning kit is therefore essential.
Notable product review site Wirecutter recommends for camera cleaning:
 Source: Shutterstock Royalty-free stock photo ID: 1095459860
NOTE: This article is specifically about protecting your gear from rain and is not applicable to underwater photography. Underwater photography poses different kinds of risks and requires additional underwriting information to insure. If you do any photography underwater (or at the surface of water), contact us to discuss your insurance coverage options.
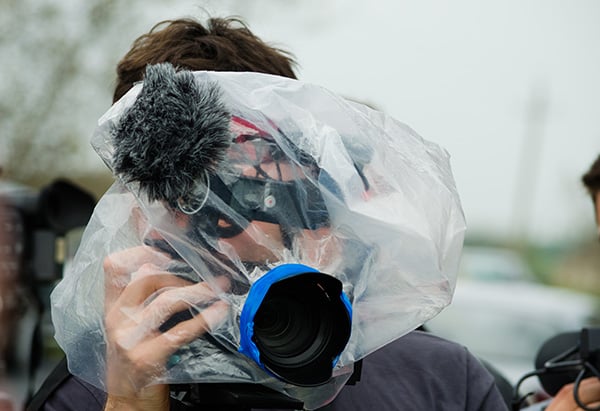
Insurance claims do occasionally arise from cameras being damaged by rain, so let’s review some best practices to prevent rain-related damage to your photography gear. Professional cameras are expensive, and you don’t want to risk ruining yours in a single photoshoot.
Use a camera rain cover / rain sleeve; these are generally inexpensive. Some well-known brands include Zacro, OP/TECH and Movo [Amazon Affiliate Links]. You can find waterproof camera cases, lens hoods and custom rain covers. The Think Tank Photo Emergency Rain Cover [Amazon Link] is another product with mostly positive reviews on Amazon.
Weather sealing a camera refers to having rubber gaskets in the seams to keep water from the camera’s internals. But if the lens doesn't have weather sealing also, water can still enter into the camera through the lens mount. Therefore, make sure to keep the lens mount dry.
Many cameras are already weather sealed, but don’t assume that your camera is necessarily sealed just because it’s a new model. Be sure to check with the camera manufacturer to verify.
If your camera isn’t weather sealed and you still want to risk shooting in the rain, consider getting a camera condom – yes, that’s a thing! A camera condom (or skin camera protector) is a rubbery skin for point-and-shoot cameras, similar to the cases that have been protecting iPods and iPhones for years. Well-known brands selling these include Delkin and Polaroid. [Amazon Links]
But, ideally, if you're really into shooting in rainy conditions, get a sealed camera body and lenses.
 Source: Royalty-free stock photo ID: 386799562, Shutterstock
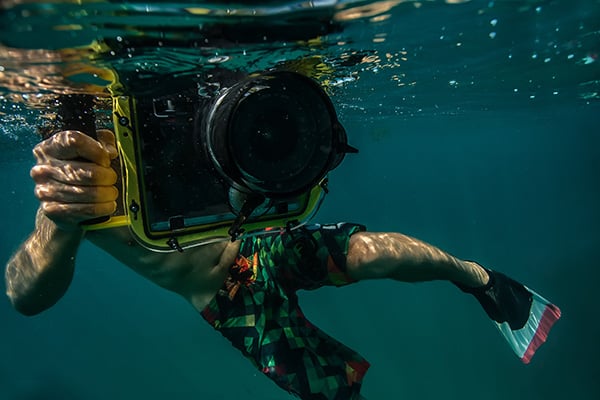
Let’s face it – photographing underwater is an inherently precarious situation, but it can also result in some amazing imagery, so the reward can sometimes outweigh the risk. And photographers will continue doing underwater photography as long as this prospect exists, so let’s review some ways that photographers can protect their valuable gear while underwater.
Note: underwater photography is not automatically covered and requires special underwriting authorization (but coverage is available). Contact us for more information.
Consider using a dome cover for your camera such as the Vbestlife Underwater Diving Dome [Amazon Link]; these waterproof domes lengthen the distance between the lens and water by ~30mm, with a wide angle to make the picture clearer.
Get a water resistant hard case for your memory cards, such as the Honsky Aluminum Water Resistant Memory Card Carrying Case [Amazon Link]. A water resistant phone case would also be an option for holding the memory cards, such as the JOTO Universal Waterproof Pouch [Amazon Link].
Get a waterproof camera strap to attach to your underwater camera and/or housing so that your camera doesn’t float away from you! One example of such a product is the Float Foam Wrist Strap JJC Waterproof Camera Floating Hand Strap [Amazon Link].
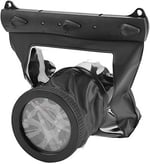 There are underwater camera bags; most are for DSLR cameras. The DSLR Camera Universal Waterproof Underwater Pouch [Amazon Link] looks like a decent option. It is waterproof down to 20 meters deep.
Get a dry bag that fits all your gear or even a whole backpack. Something like the Boundless Voyage TPU Waterproof Bag [Amazon Link] should work. It is large enough to carry most photography equipment and is 100% waterproof.
Try to minimize contact with the reef when shooting. Many underwater photographers carry a simple aluminum rod [Amazon Link] that also doubles as a pointing device for this purpose.
 Source: Royalty-free stock photo ID: 1638413680, Shutterstock
It’s true – if you’re a professional photographer who can afford to purchase the highest quality camera bodies, they should be able to withstand the heat without any issues, but there are still some best practices that you should keep in mind when shooting in hot weather. Let’s review those in this article…
First, check with your camera’s manufacturer to find out the operating temperature of the camera. Avoid taking the camera into environments that will likely exceed this temperature.
Avoid condensation issues by allowing your camera and other equipment to warm up gradually before exposing them to a hot environment. Avoid rapid changes in temperature; limit the number of transitions from warm to cold, and vice versa. For certain camera models, you can even find anti-fog eyepieces [Amazon Link] that reduce condensation.
Consider placing your camera body and lenses in airtight, sealable bags with silica gel packets [Amazon Link] inside before exposing them to heat. An airtight camera case such as the Pelican Small DSLR Camera Case [Amazon Link] would also do the trick.
If you have a camera with an articulating LCD screen, tilt the screen away from the camera body. If you leave the LCD pressed up against the body, this will increase the amount of heat on the camera and can lead to overheating.
Consider leaving your camera’s battery door open, assuming the batteries are adequately snug inside. The door usually doesn’t have to be closed to use the camera. This practice can help dissipate heat.
If possible, use external batteries. If you’re shooting and have a power outlet nearby (or one that could be accessed with extension cords), there are dummy battery adapters that could be used. The dummy battery rests in the camera, which only has a power cord inside, and not an actual battery.
Consider covering any large black surfaces of your camera with aluminized heat shield tape [Amazon Link]. This should reflect the majority of radiant heat. Similarly, placing a white towel or rag over the camera body and lens should reflect sun and keep the camera from heating up too much. Just drape the towel; do not wrap the camera, as you want some air to be able to flow around it.
Consider getting a Lighting Reflector and Stand Kit [Amazon Link]; leave the camera under the reflector with the silver side up. Similarly, you could place a mini umbrella [Amazon Link] over the camera.
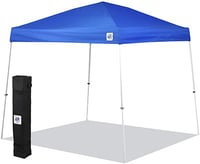 Consider using a portable tent such as the one from E-Z UP [Amazon Link]; keep yourself and your photo gear under this for the majority of the shoot and you’ll avoid overheating issues.
Cordless fans powered by lithium-ion batteries [Amazon Link] can help cool down your photography gear in hot environments.
Look at upgrading your memory card(s) – especially if they’re old – to ensure they’re efficient; your camera will then not build up as much internal heat while you shoot.
Device-intensive features such as Live View and HD video recording will generate heat; therefore, don’t use them in the heat unless truly necessary.
If feasible, have a backup camera body and rotate between the two bodies.
 Source: Royalty-free stock photo ID: 1697115355, Shutterstock
Many (often amateur) photographers think that water is the most dangerous element on a beach that could potentially damage their photography gear – but seasoned photographers know that sand is just as much of an issue. Many of these photographers have likely learned the lesson the hard way – a small grain of sand managed to get into their camera lens or sensor, sometimes irrevocably damaging it. Moreover, even if salvageable, this kind of delicate repair often comes at a high cost.
 Source: Royalty-free stock photo ID: 1569424465, Shutterstock
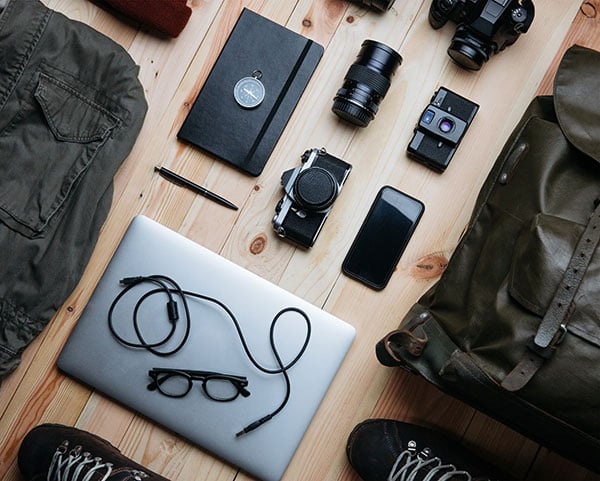
Photographers often have a lot of photography gear and it can, eventually, become difficult to keep track of what’s going out and what’s coming in. Since we provide photography insurance and want to help photographers protect their gear, it also makes sense to provide some tips on maintaining and inventorying photography gear.
Determine where each piece of photography equipment should go based on how available you need it to be. For example: some of your less frequently used equipment could be placed in the dark pockets of a camera bag, while your one ND filter should probably go in a protective case that you keep on you.
Ideally, you have a camera bag with separate sections, such as the Peak Design Everyday Messenger Bag [Amazon Link] or the Tenba 637-403 Cooper 13 DSLR Camera Bag [Amazon Link]. Consider dedicating specific pieces of gear to each section, rather than just stuffing gear in haphazardly. Organizing your camera bag in this manner not only makes you a more professional photographer, but it will prevent you from buying memory cards when you still have some!
A camera harness such as the Nicama Camera Carrier Chest Harness Vest [Amazon Link] or the Cotton Carrier G3 Dual Camera Harness [Amazon Link] can be useful for keeping your photography gear on your person as much as possible, which is the best way to prevent theft.
 Source: Royalty-free stock vector ID: 206120767, Shutterstock
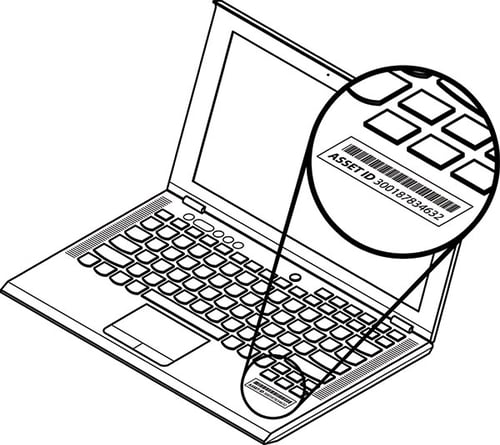
In addition to serial numbers, asset labels can be helpful. Asset labeling is the process of giving a unique identity to each piece of your equipment through assigning it a specific code or number. This is accomplished by affixing a label to the equipment that bears the number. An example of such a product is the AVERY PermaTrack Metallic Asset Tag Labels [Amazon Link]. The CHEQROOM mobile app/asset tagging product is another example.
If handling many items, a serial number – while important to record for warranty & repair purposes – isn't ideal because most professional photographers likely want a faster method of counting/auditing their gear. Especially if they have many similar-looking items, as many photographers do, asset labels are helpful to identify which item is which.
 Source: Royalty-free stock photo ID: 506775367, Shutterstock
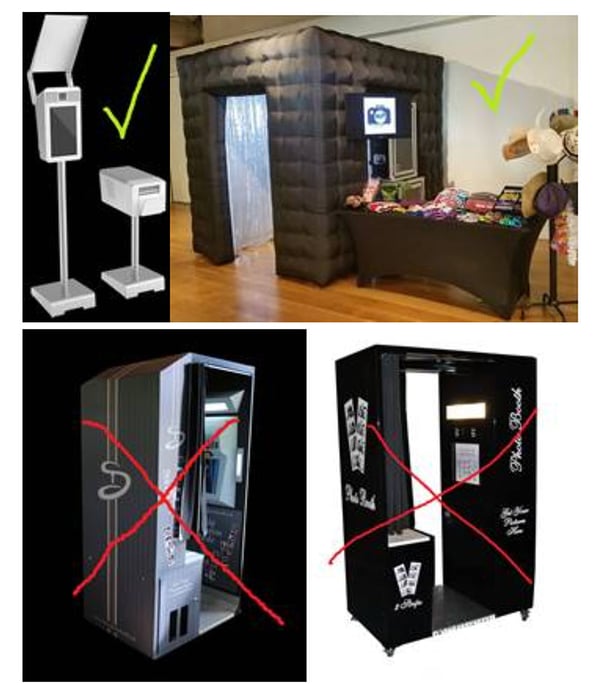
We’re often asked, “Does Front Row’s photography insurance program cover photo booths?” The answer is yes; it does, but within some narrow parameters explained below. We do not cover any and all photo booths – they have to be a certain kind of photo booth. Read on…
Photo booths are eligible for Front Row’s photography insurance program if:
There are no exceptions made for physical room-type booths.
Think nothing bad can happen to your photo booth? Well, think again! Front Row’s photography insurance program includes coverage for theft, damage, fire, and loss of use, and any of these unfortunate incidents could happen to a photo booth.
If your photo booth is stolen, insurance could replace it (this is covered under the policy through filing a claim).
Fire is a scary thing – and although we certainly hope it doesn’t happen to your photo booth – one bad fire is capable of destroying a photo booth business very quickly.
If you’re a photo booth business owner, you’ve likely heard plenty of stories already about photo booth vandalism. Photo booths seem to be a preferred target of vandals, for whatever reason. But remember, as mentioned above, your photo booth cannot be left unattended if you expect insurance coverage.
There are other examples of damage that could happen even with a photo booth attendant present, though. What if you plug in the wrong power cord, leading to a short circuit, damaging your photo booth and maybe even the venue too? The venue owner could sue for damages. That’s where commercial general liability (CGL) coverage comes in handy.
We often get this question: “what if [insert hypothetical situation] happened? Would I be covered?” It is impossible to answer this question, because every claim is unique. Maybe you’ve heard an insurance broker give you vague, evasive, unsatisfying answers. That’s potentially because you’re asking the wrong question. Instead of asking “what’s covered?” you should be asking “what’s not covered?”
Most insurance policies work like this: everything is covered, except what is explicitly excluded by the policy. This allows for all kinds of unanticipated, unimaginable types of losses to be covered. It also ensures wordings aren’t 10,000 pages long. When you submit a claim, the adjuster will look through the wording to see if an exclusion applies. Some typical exclusions are: “wear and tear,” “mechanical breakdown”, “fungus”.
Lots of people buy camera gear second-hand. Claims adjusters are aware of this fact. If you don’t have original receipts, don’t panic. You can still cover the gear with your insurance.
Proof of ownership can take different forms, depending on the loss. If a lens is cracked, the proof is the cracked lens in your possession. You would only need to provide documentary proof in “total loss” situations (theft, destroyed in a fire, etc.). In these situations, original receipts are obviously best, but in the absence of these, the adjuster may use their judgment or common sense. They may try to work with you to find “creative” ways to substantiate prior ownership.
In all cases, it is up to the adjuster’s discretion; they need something that will “hold up”, and they will be using their “Spidey-senses”. If they think something is suspicious, they will ask for more concrete evidence and they may decline a claim. So, do what you can prior to a loss occurring to substantiate your ownership of the items you wish to have covered.
When a crime has been committed, you will need to report the crime to the appropriate authorities. For a theft claim, an adjuster will ask for a police report number as part of your supporting documentation. This also applies in foreign countries.
There are also special conditions related to theft from an unattended vehicle – there must be visible signs of forced entry. Basically, the insurance company is saying: if you leave your gear in your car, make sure you lock your car. They will need visible evidence that someone had to pry their way into your vehicle, so take pictures of the broken glass, or the scratches on your car. Without visible evidence of forced entry, your claim could be denied.
The insurance company's policy wording on unattended/unlocked property reads as follows: "we will cover theft of covered property from a locked container, vehicle or trailer when there are visible signs of forced entry. This exclusion does not apply while covered property is in the care or custody of a common carrier."
September, 2015 — Front Row Insurance Brokers Inc. is excited to announce the launch of their new online camera insurance program. This unique offering allows photographers the chance to get quick quotes and process policy documents in less than five minutes, 365 days a year, 24/7 – the insurance equivalent of ‘point & shoot’.
 “Visitors to the site can sleep easy knowing they can pick up a gig and be out the door safely within minutes with their gear covered, general liability in place, and their office contents, laptops and library stock covered at no extra cost,“ stated David Hamilton, President of Front Row in Vancouver. “This is a disruptive product in the photographers insurance market because of the much lower cost and ability to purchase a policy in minutes without having to speak to a broker. We expect there to be a lot of interest among the approximately 14,000 commercial photographers working in Canada. The savings should average 30%. The hundreds of thousands of hobbyists in Canada who rely on their homeowners policy could find a claim denied if they have sold even one picture or accepted money for taking portraits of their neighbours’ kids. Commercial use of photography equipment is not covered under a typical homeowners policy. Our online camera insurance is an inexpensive and fast solution to this problem.”
Available to Canadian photographers at https://photographer.frontrowinsurance.com. The policy term is for 12 months and coverage is provided in most countries worldwide except those subject to trade restrictions. Rental equipment coverage is also available. All equipment is covered for theft, damage, fire and loss of use.
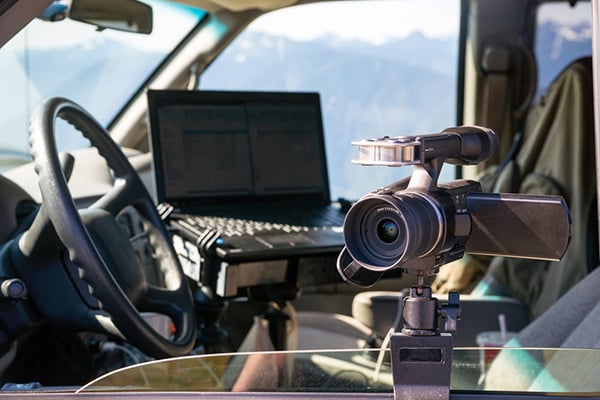
The truth is that there is no foolproof solution when it comes to storing camera gear in a vehicle such as a car or van. Ultimately, there will always be some risk involved in doing this. However, sometimes it is necessary, and there are some steps that can be taken to mitigate the risks.
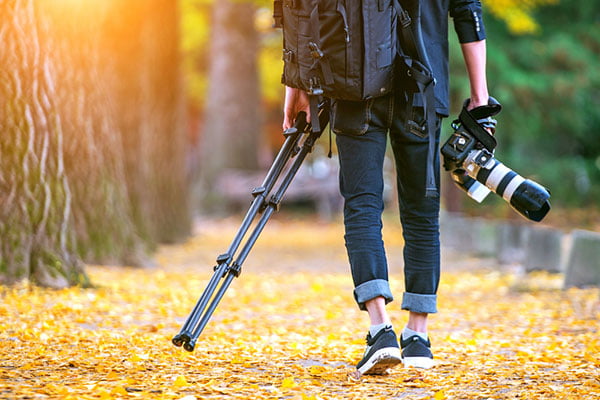
Image Source: Shutterstock
Any good travel tripod should be durable, versatile, and easy to use while on the go. A travel tripod should be lightweight and compact enough to fit into a carry-on bag or backpack; but at the same time, it should be sturdy enough to withstand bumps that inevitably occur while traveling around with gear.
Let’s do a resource round-up of some of the more affordable travel tripods on the market.
The Manfrotto Befree GT XPRO Aluminum Tripod [Amazon Affiliate Link] is lightweight, compact, and made from high-quality aluminum.
 Source: Royalty-free stock photo ID: 551251480, Shutterstock
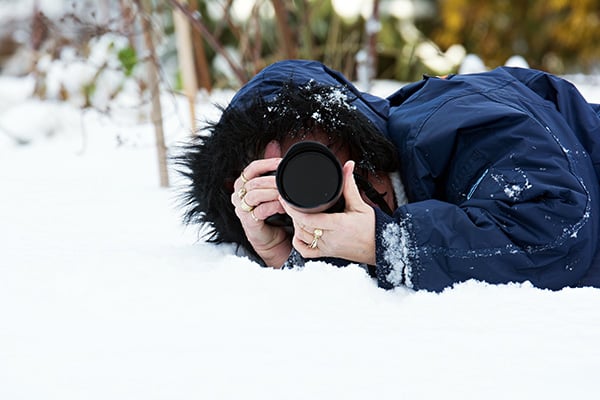
It’s true – most modern photography equipment is generally durable enough to withstand snowy conditions, but there are still some best practices that you’ll want to keep in mind when handling your photography gear in snow and cold weather conditions. Let’s review those in this post.
Try to avoid changing lenses outdoors, as that could trap condensation in the camera/lens for an extended period. If you must do so, be very careful!
Also, try to avoid breathing on your camera’s LCD screen. The moisture from your breath could freeze the screen and it can be a pain to get the ice off. If you think breathing on the LCD cannot be avoided, it wouldn’t hurt to have some de-icer spray in your camera bag, such as the CRC Ice-Off Windshield Spray De-Icer [Amazon Link] (yes, it can work on LCD screens, too!)
You may also experience LCD screen playback issues in cold temperatures. Consider disengaging the automatic playback of images while shooting.
Your batteries will drain faster in the cold. Look into getting a spare battery and an external battery pack handle/battery grip, such as the Sony Vertical Grip for Sony Alpha cameras [Amazon Link]. The grip provides some good moisture resistance.
Keep the extra batteries in your jacket or pant pockets to keep them warm with body heat.
Break a hand warmer pack [Amazon Link] to keep your batteries warm. You could wrap a hand warmer around the section of the camera that contains the batteries (usually the handgrip for DSLRs).
Get a water resistant hard case for your memory cards, such as the Honsky Aluminum Water Resistant Memory Card Carrying Case [Amazon Link]. A water resistant phone case would also be an option for holding the memory cards, such as the JOTO Universal Waterproof Pouch [Amazon Link].
Use a lens hood to prevent snow from touching the lens. The Kiwifotos 50mm Reversible Lens Hood seems to have mostly positive reviews on Amazon. The FOTGA Bayonet Mount Lens Hood is also well reviewed. [Amazon Link]